Monday, July 30, 2012

More Northland Route: A Great Canadian Model Railroad


I didn't have space in the previous post about the Northland Route, Arnold Walker's great Canadian model railroad, to show all the photos I wanted to share. Below find a few more.

But first, this note. What makes Arnold's layout great isn't just the floor to ceiling scenery, the structurees, the locomotives or the great bridges--it's the details. Not matter where you look, there are a myriad of details on buildings, in buildings, trackside--you name it. You could visit the layout ten times and still find something new on your 11th time there.

Anyway, here are more photos--and don't forget the video of this layout, too.


Sunday, July 29, 2012

Great Canadian Model Railroad: The Northland Route


Winnipeg is home, or was home, to some great layouts—Stafford Swain’s Whiteshell Sub., Ken Epp’s four-level Cougar River Sub., and George Myer’s Central Northern Sub., plus some I haven’t got around to photographing yet. But I think the best of all is Arnold Walker’s Northland Route.


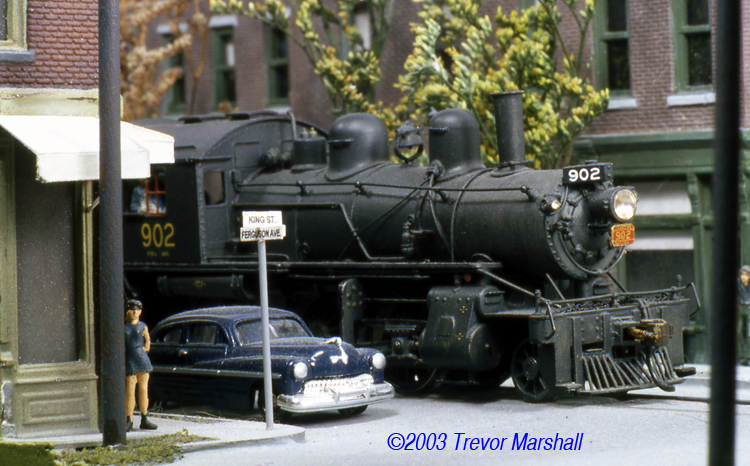
The HO scale layout— which fills a 16 by 40 foot room in Arnold’s basement, features generic western Canadian scenery—mountains, prairies and an urban area. He started it 1991; the mainline was completed in 1992 and the basic scenery was done a year later.


The track plan is a 200-foot double-track mainline in the shape of a dog bone. A total of 11 staging tracks supply trains for the layout; each track can hold two locomotives and 20 cars. Trains are powered by DCC.


A special feature of the Northland Route are its bridges—eight of them, altogether, either kitbashed or scratchbuilt, including a working bascule lift bridge. The longest is about six feet long.


Another feature is BC Rail coal operations, modeled after that former railway’s electric operations at Tumbler Ridge, B.C. The Northland Route contains a 120-foot long point-to-point electrified section of track from a coal load out to an interchange.

Motive power includes two scratchbuilt GMC GFC 6000 HP electric locomotives. (See the August and September, 1995 issues of Mainline Modeler for articles about how Arnold built the unique units.)


The locomotive shops area is another highlight, featuring a turntable, transfer table and diesel shop that is open on the aisle side so visitors can look inside.


Other highlights are the large grain terminal and oil refinery; the size of the refinery is doubled by Arnold’s use of a mirror.


Arnold use about 550 pounds of plaster for the mountains; hundreds of handmade spruce trees dot the hills and mountainsides. He also painted the backdrop himself, using techniques learned from a PBS TV show.

The Northland Route doesn’t represent a particular time or era, but the motive power is mostly modern with units from the CPR, BNSF and BC Rail—and a smattering of classic CPR maroon and grey, a Union Pacific turbine that Arnold really likes, plus some Australian GE Cv40-91 units that he purhased during a trip to that country.


In addition to the photos on this page, you can see a video of Arnold’s layout, with a special focus on his mountain bridges, on YouTube; click here  to watch the Northland Route in action!

(More photos of the Northland Route can be found here; I just didn't have enough room here for all the great shots of Arnold's layout. The Northland Route was also featured in Canadian Railway Modeller, T1T5.)


Wednesday, July 25, 2012

Hiding the Hole, Part III


In earlier posts, I wrote about the hole in the wall I need to hide (between the layout and hidden staging), and showed early progress in said hiding of said hole.
Well, more progress is being made. The hill occluding the hole has been covered in ground foam, the track has been painted and ballasted, and a temporary bridge has been put in—as can be seen in the photo above.
The hole before paint, ground foam and ballast.


Right now, the area looks like southern Alberta after a rain—no trees. But that will change soon. And I will add backdrop trees on the wall itself.
The hole during painting and adding ground foam.


As for adding the ground foam, I do pretty much what every one else does: I paint the Styrofoam with brown latex paint, then sprinkle it on. Since nature isn't uniform, I also use a variety of colours. My favorites are blended turf, burnt grass, weeds and yellow grass. I use some clump foliage for small bushes. When fall comes, I will crush some dead leaves to provide a bit more texture and colour to the cover.
All-in-all, we’re coming along, if a little bit slowly. At least trains are running once again!

Monday, July 23, 2012

Fantasy Schemes II, or Can You Believe Those Steam Locomotives?


Seven years ago this summer, we hosted Golden Rails 2005 here in Winnipeg to celebrate the 50th anniversary of the Winnipeg Model Railroad Club.

There were many highlights at that convention. But one that stands out for me was the unique steam locomotives painted by B.C. modeller Mike Barone--as seen above.

Mike painted the brass steamers especially for the convention; he planned to paint them back into their more standard schemes when it was over. But now you know what CN, CPR, BNSF and Conrail would have looked like if steam had survived into the 21st century.

Speaking of unique fantasy schemes, the unit below can be found on the layout of the Selkirk, Man. model railroad club (conviently located near the scrap yard):


My friend Norm, a dedicated Pennsy modeller, calls it an "abomination." Maybe, but it sure is unique, too!

Click here for another post about unique Canadian fantasy schemes.

Photo of Mike Barone's steam locomotives by John Johnston from the July/August, 2005 issue of the Canadian Association of Railway Modellers newsletter The Canadian.

Saturday, July 21, 2012

Video of the Twin City Model Railroad Museum: A Great O Scale Layout


Earlier this month, I went to Minneapolis-St. Paul. If you go to that city, and you enjoy model railroading, you have to stop by the Twin City Model Railroad Museum at Bandana Square—one of the finest O scale layouts in North America.


The last time I went, two years ago, I took photos of the layout; this time, I brought my tripod so I could shoot some video. I’ve posted the video on YouTube; click here  to see it.

About the layout: Set in the transition era, the Twin City Model Railroad Museum depicts the St. Anthony Falls Milling District in Minneapolis-St. Paul, complete with the city’s iconic stone arch and other bridges; the city’s former streetcar line; the Mississippi River as it flows beneath the high river bluffs of southeastern Minnesota; a rural Minnesota town; a recreation of the 1913 Great Northern Station in downtown Minneapolis; and a freight yard, modeled after the Minnesota Transfer Railways switching yard located  between Saint Paul and Minneapolis.


While there, I also visited their fabulous Toy Train Museum; click here to see photos and learn more about that wonderful addition to the museum.

If you are ever in the area, make sure you stop by to see this great layout—you'll be glad you did!

Visit the Twin City Model Railroad Museum website. For the video, click here.


Wednesday, July 18, 2012

Hiding the Hole, Part 2 (or, a basic primer on working with Styrofoam)


In a previous post, I wrote about my efforts to hide a hole in the wall. The hole is in the wall between the layout room and the storage room containing the staging yard. Here's the hole I needed to hide:


I used a four-inch thick piece of extruded Styrofoam which I just happened to have on hand--I had found in a garbage pile at a construction site a number of years ago. I kept it, thinking it might come in handy some day. It did.

I carved the Styrofoam with a handsaw for the basic features, and used a Stanley Surform to give it a final shape.


Yes, working with Styrofoam create a mess (although not as messy as working with plaster). A Shop-Vac is a must! But don't throw away the bigger pieces that you carve off--they will come in handy later.

After carving a couple of pieces of Styrofoam on either side of the hole, I test-fitted them and glued them down. A piece of balsa wood stands in for where the bridge will be. The double stack container car ensures that I have enough height underneath the bridge.


Next up: Adding more land forms--this is where those small pieces leftover from the big carving come in. I assembled them to make ridges and to create transitions between the larger forms. They were glued and held down with nails until the glue set; when dry, the nails were removed.


After that I covered the cracks between the pieces (and the nail holes). For that I use cheap spackling paste (the kind used to fix cracks in sheetrock walls).  I apply it with a popsicle stick.  (The brown paint was left over after painting the rails; I didn't want to waste it, so I spread it on the terrain.)


I also finished off the edge with fasica (left over from when I tore down part of the layout).


A bit more about those left over Styrofoam pieces; they also come in handy for filling cracks in hills (e.g. where the Styrofoam doesn't sit flat), or cracks between the edge of the layout and the fascia (especially where it curves).

Next up: Ground cover. For that I will paint the Styrofoam a mix of brown, black and white latex paint (it has to be latex) to create different shades, then sprinkle on Woodland Scenics ground foam. After that I will ballast the track and add rip rap of various sizes along the bottom of the hill. Polyfibre sprinkled with ground foam will hide any remaining cracks or imperfections. I'll add some backdrop trees, then  plant "real" trees, and, finally, build the bridge.

Tuesday, July 17, 2012

Another Unusual Articulated Hopper: CN 399000


When doing the post about CN 398000, which was built to carry grain, I completely forgot about CN 399000, made to carry potash.

Like 398000, 399000 is a one-of-a-kind hopper. Built in 1993, it is 55 feet long and has a capcity of 4600 cubic feet. It is painted with the standard Canpotex Limited grey with the green logo.

Thanks to Eric of Trackside Treasure for the reminder. Photo from Eric and Laurence Gagnon from the CN Lines website.

Saturday, July 14, 2012

An Unusual Car: CN Articulated Hopper 398000


Here’s an interesting model: CN 398000. Scratchbuilt by Jim Stanitz, it is one of about 25 models he has made over the years.
Jim’s goal was to make models of cars that either weren’t available at the time he made them, or never will be. CN 398000 fits both categories; the car is a one-off, and there aren’t many manufacturers keen on making a model of a car for which there was only one prototype!


The car was built by CN in 1985 as a prototype for potential use on the line in northern Manitoba to the port of Churchill. (You heard correct; although Manitoba is a prairie province located in the centre of Canada, it has an ocean port in the north that serves ships from around the world. Read more about it and see photos here.)
Since that line is laid mostly on tundra, for years it couldn't accommodate heavier hopper cars. For a long time, rolling stock was restricted to 40 foot boxcars. (It now is able to take the heavier cars.) 
CN thought that that one way to use heavier cars on the line was to build an articulated covered hopper. The car, which rides on three 70 ton trucks, could reduce the axle loads of the car—allowing it to operate to the port.

Ultimately, the government of Manitoba decided it was more cost effective to rehabilitate aging 40-foot boxcars for use in grain service, so CN 398000 became unnecessary for use on the Churchill line. It is still in use, though, and can periodically be spotted on trains in Canada and the U.S.
You can read about how Jim built this unique car in the most recent issue of Canadian Railway Modeller.

Prototype photo from CN Lines.

Thursday, July 12, 2012

Great Canadian Model Railroad: Rich Chrysler's CNR Hagersville Sub.


Many in the Canadian model railroad community were saddened to learn of the passing of Rich Chrysler, who died earlier this month.

Rich, who was 59, was a highly-regarded modeler and researcher. He was a familiar sight at southern Ontario train shows, where he would share his skills and passion for the hobby with others.


Rich’s home layout was the HO scale CNR Hagersville Sub. He was also a member of the Canada Southern Free-mo group, and earlier was a member of the Ontario & Eastern Railway, which I featured on this blog in 2011.


His double-deck layout, set in the 1950s, captured most of the highlights of that line, including many crossings and interchange points with railways in Southern Ontario. The layout appeared in Railmodel Journal in 2003.
Rich’s layout showcased many layout design features such as windows that created a shadow box presentation, and a partial mushroom.


Locomotives on the layout were modified brass imports, the rolling stock were mostly craftsman kits, track was all hand-laid code 70 rail (with code 55 on some sidings), and most of the structures were scratchbuilt to match the specific prototypes. Rich used DCC to control the trains.


There are a few videos of Rich’s layout on YouTube. Click here, here or here to view them.

The future of the layout is uncertain at this time.

Thanks to Trevor Marshall for photos and information about Rich.